
The first pizza I ever made in a pizza oven was an absolute disaster – at least I thought so. Like most guys, I tend not to ask for directions or read the instructions. So, I figured that cooking a pizza in a wood-fired pizza oven was as simple as taking the oven out of the box, lighting the fire, and throwing in the pizza – simple as that! Boy, was I wrong!
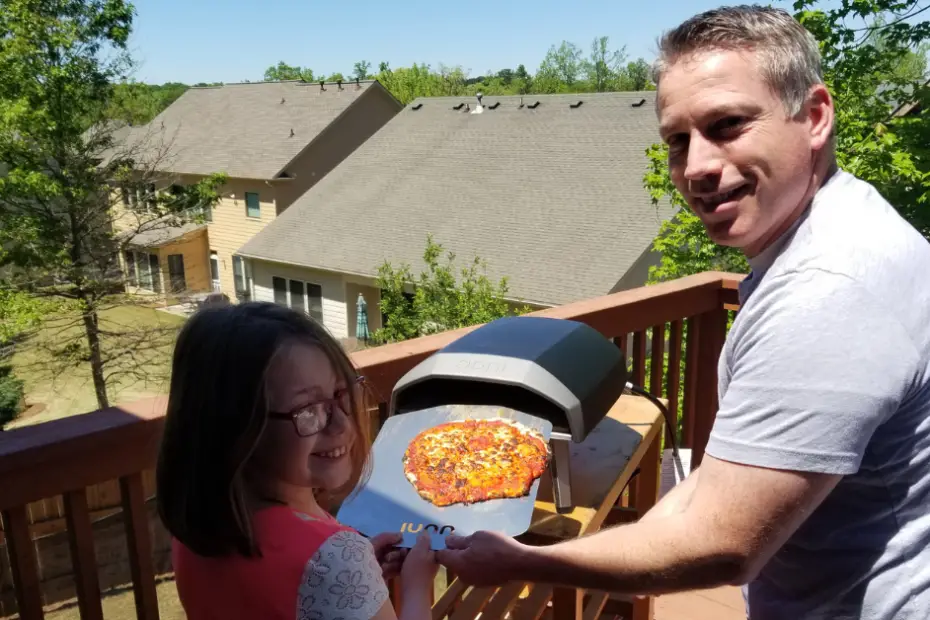
The pizza in this picture was not my first. No, mine was worse, and I was too embarrassed to take a picture. But it is someone’s first pizza. Let’s make sure it’s not your first pizza!

DISCLOSURE: This post may contain affiliate links, meaning when you click the links and make a purchase, we receive a commission at no extra cost to you.
Don’t Worry – Pizza is Not That Hard to Make
Today, when I tell this story, it’s usually when I’m with friends helping them make pizza for the first time. They are surprised at how easy it is for me to stretch the dough, launch the pizza, and cook it to for all to enjoy. Soon, they are surprised at how easy it is for them to stretch the dough, launch the pizza, and cook it to perfection.
I want them, and I want you, to understand that making pizza can be tricky, but it’s not difficult. I want to share this experience with you so you can avoid the pitfalls that I ran into – and become a pizza expert much faster than I did.
Setting the Scene
But first, you need to understand the circumstances. It was a Saturday early afternoon. My 10-year-old daughter had a basketball game and two of her friends came over to our house after the game.
They were hungry, bordering on HANGRY, and I was anxious to use my new pizza oven – no problem! But there was a problem – one of the girls said she didn’t like pizza. Solution: I told her I would make the pizza and if she didn’t like it then I’d make her something else.
My first pizza oven was an Ooni Pro outdoor portable pizza oven. Looking back to 2019, I feel pretty lucky that I had the Ooni Pro for my first pizza oven (my cousin still uses an Ooni 2, bless his heart). After all, I had 4 choices of fuel to chose from – propane, wood, charcoal, or wood pellets.
I invested in both the gas burner and wood pellet tray for the Ooni Pro. Why did I buy the wood pellet tray? That’s simple!
- I was not very smart
- I love my Traeger smoker, and
- I had tons of pellets.
Little did I know that using the Ooni Pro wood pellet tray was a huge mistake.
Getting Heated
So, I setup my Ooni Pro with the wood pellet tray, put in the wood pellets, and then discovered that it was really hard to light those things on fire with a little bbq lighter. Ok, not hard – it was nearly impossible!
I still to this day am not quite sure how I got it started! I didn’t think about things like natural, food safe firestarters. I didn’t have a propane torch lying around
By the way, if you are going to cook pizzas with wood, charcoal, or wood pellets, you MUST invest in both a propane torch and a box of natural firestarters!
Show Me the Dough
Well, I (eventually) fired up my Ooni Pro and then went inside to make my own pizza dough. For the very first time. Yes, after I had already started the fire.
I told you that I wasn’t very smart! The good news is that this means that if I can get good at making pizzas, ANYONE can get good at making pizzas!
Luckily, I did follow the instructions when making the pizza dough. I just didn’t realized how long it took. And the whole time what did I hear over and over again? “Is the pizza done yet? Is it ready yet?” The things we do for our children and friends!
Eventually, the dough was done…more or less…depends on how long you like to let it rise.
I broke off an unmeasured chunk of dough, rolled it out with my rolling pin, sprinkled a little bit of flour on the metal peel, and then laid the dough on the peel.
The girls helped me make the pizzas, so that was good. I thought we would start off easy, so we added the pizza sauce, mozzarella, and pepperoni. We were ready to go!
Napoli, We Have a Problem
So, with pizza in hand, we head outside. Me and my little squad of circling vultures.
What do you think I found outside? That’s right – a not nearly hot enough Ooni Pro!
Even though I had added some more pellets to the oven during different stages of the dough preparation, it still was not anywhere near hot enough.
How did I know? I was a dumb rookie, remember? It’s not like I had the sense to get a infrared thermometer!
Just trust me…the oven was not hot enough. But I threw on some more pellets in hopes to get as much heat going as possible.
Now, I went to launch my pizza… and… nothing happened! The pizza went nowhere!
This pizza has latched on for dear life – clinging to my metal peel! Knowing that if it let go, it would descend into the fiery pit!
I tried the pull the pizza to the end of the peel and it threatened to tear. I tried to push the pizza and it crumpled.
Luckily I had a long, flat piece of aluminum (think flat cookie sheet), and I scraped and shoveled that pizza onto the stone of my Ooni Pro!
It was a hot mess!
Sauce and cheese were on the stone. This made the pizza stick to the stone and hard to get up with the peel. The peel was smeared with cheese and sauce, so this didn’t make it very ‘scoop it up from the pizza stone’ friendly.
Here Goes Nothing
Eventually, the pizza cooked on the bottom and that made it easier turn, and I finally pulled out a cooked blob of pizza nightmare.
How bad was it?
You know how most people will take a proud papa picture of their first pizza. No way! It was so bad I wasn’t going to embarrass myself with that picture – although today I wish I would have just for you.
I repeated the process with two more pizzas with similar results.
Well, I figured, at least the girls had fun making the pizzas with me. They really enjoyed the entire pizza making process – rolling the dough, “decorating” the pizzas, and watching the pizzas “cook” in the oven.
For a pizza dough recipe that will never fail, check out our Easy Outdoor Pizza Oven Dough Recipe
If nothing else, no matter how the pizzas turned out, seeing their happy faces throughout the process was worth everything.
This is when I realized that making pizza is not just about making food – it’s a social extravaganza! Ever since then, I have tried to involve others in the pizza making process – whether it was my kids or friends that come to visit – I always try to make them a part of the process and a part of the fun!
Still, here I was with 3 hungry girls and 3 of the ugliest pizzas ever created by human hands! This didn’t give me much hope that they would like the pizza – especially the one that had already told me that she didn’t like pizza.
Wait, What?
Real quick. Remember that I told you that one of the girls didn’t like pizza? By saying ‘she didn’t like pizza’, what I learned later was that she never ate pizza because she disliked it so much.
And here I am handing a train wreck of a pizza to a girl that doesn’t like pizza!
First, the starving friend girl dives into the pizza. The non-pizza look of the food before her did not discourage her one bit.
I was embarrassed and ready to leave the room when I heard her scream, “Mmmm! This is the best pizza I’ve ever had!”
Wait, what?!
What about little miss ‘I don’t like pizza’?
She LOVED it! She couldn’t get enough of it!
To tell you what a big deal this was, here is the conversation that I had with her dad the next day:
Dad: “So I hear that my daughter ate pizza at your house yesterday?”
Me: “Yeah, she really seemed to like it!”
Dad: “Yeah, but…she ate pizza! This girl doesn’t eat pizza!”
Me: “I guess she does now!”
I will finish this story by sharing with you my favorite quote of the day. When the parents came to pick up their kids, ‘starving girl’ told her mom that my pizzas were an “ooey, gooey, disastrous, delicious, mess!” How’s that for an endorsement?
Don’t Be Me
With time and practice, I have become much better at cooking pizzas. Looking back, I have identified the 3 areas of improvement that I needed to make: pizza oven heat, dough management, and using the right tools.
Pizza Oven Heat
To cook a proper, Neapolitan style pizza, or anything close enough to it, you need to have your oven up over 900 degrees Fahrenheit.
Really, there are 3 fuel sources to choose from: gas, wood, and/or charcoal. (wood pellets are for Traegers, not pizza ovens)
- Propane Gas
2. Wood
3. Charcoal
Figuring Out the Dough
First step was to figure out why the pizzas were sticking to the peel. Here are 3 reasons that the pizzas were sticking to the peels – and how I have been able to fix these issues.
- I used a metal pizza peel
- I left the dough on the pizza peel too long
- I used regular flour instead of corn meal
Proper Pizza Peels
Metal Pizza Peels
In my opinion, metal pizza peels are not for launching pizzas . “Launch” = fancy talk for putting a pizza into the oven for the first time.
Have you ever used a suction cup? If you have, you probably noticed that they stick best to perfectly flat surface such as metal or glass. You probably also noticed that adding just a couple drops of water makes that suction significantly more powerful.
That’s what happens when you make a pizza on a metal peel. Even if you have added flour or corn meal to the peel before putting your dough on it, moisture still builds up while you are adding your sauce and toppings. Unless you get the pizza from counter to peel to oven rather quickly, it is going to stick.
If it does stick, there is still hope. You can lift up corners and blow underneath the dough to try to trap air under the pizza. You can also throw some new, dry corn meal as well.
But, there is a better tool to launch pizzas…
Wood and Bamboo Pizza Peels
That’s right. Wood peels are much better for launching pizzas into an oven – and they are the most common and affordable option. I find bamboo peels to be even more stick resistant and they typically aren’t much more than wood peels.
The goal here is to make a pizza right on the peel so it can be carried over to the pizza oven when ready without disturbing the pizza or risking a hole by transferring a loaded, uncooked pizza from the counter to the peel. We’ll leave that move to people that get paid to make pizza. I’m more interested in teaching friends and family how to be successful in their first try.
When I make pizzas, I layout wooden peels on the counter, lightly dust them in fine corn meal, and each time I stretch a dough I put it right on the peel. Then I put a friend in front of the peel and let them begin making their creation. They can sit on the peel for plenty of time to make a pizza before launching – typically without risk of sticking.
The longer the pizza sits on the peel, the more moisture will still build up – just like on the metal peel. The difference is that the moisture doesn’t create suction on a wood or bamboo peel like it does on a metal peel.
The wood seems to soak up some of the moisture while the bamboo just seems to be unaffected.
If you want to know what accessories I recommend for your pizza oven, including pizza peels, check out my article on Best Pizza Oven Accessories for Great Pizza.
Flour vs Corn Meal
You have several different options to put on your peel to keep the pizza from sticking. Flour and corn meal are the most common, so I’ll limit my observations to those two.
No matter what you put on your peel, your dough itself needs to be fully covered in flour. Starting with a moist dough will not help your efforts at all.
If you’re using flour as the non-stick coating on your peel, tends to soak up some moisture which keeps the pizza from sticking to the peel – for a little while. If the flour soaks up too much moisture it becomes sticky and it actually hurts you more than it helps.
So, if you get the dough on the peel and make your pizza quickly, flour is a good option.
When I invite friends and family over to make pizzas, I find that they like to take their time, evaluate their options, and then relatively slowly assemble their pizza to be just right. That means that they leave the pizza on the peel for longer than flour will allow.
This is what makes corn meal a better option for lightly sprinkling on your wood or bamboo peel before putting your dough on it.
Make sure you use a fine corn meal or it may be crunchy and unpleasant to eat when it is baked. Also don’t use too much corn meal or you will dump a load of it on your pizza stone. No matter what, you will leave some corn meal on the pizza stone, and that is why I use a pizza oven brush – but that’s a different article.
Either way, the corn meal acts as ball bearing and lifts the pizza up just enough to help your pizza glide into the oven.
Shimmy and Shake
You can use a wood peel and corn meal and still have the dough stick on you, and that’s ok.
The important thing is that you get it unstuck before you try to launch the pizza into your pizza oven. This is why you need to learn to shimmy and shake your pizza peel.
To test if the pizza is stuck, you gently shimmy the pizza oven front to back to see if the pizza glides along the surface. If it does not, shimmy it just a little harder. If it still doesn’t move, gently glide your fingers under the outer ring to try to break any suction that might be there. Often that’s all it takes.
Worst case scenario is that you will need to lift up a quarter of the pizza and toss in a sprinkling of corn meal. Try the shimmy test again and repeat the process with other corners as needed until that pizza glides across the top of the peel when you shimmy it.
Now your pizza is ready for launch!
Launching is where the shake comes in. I like to put the peel into the oven until the pizza is full in there, and shake the peel as I back it out. Once the pizza’s edge hits the stone, it will stay there and you just shake and pull your peel out from under the pizza.
Now, you are cooking!
Now the Metal Peel
While wood and bamboo peels are great for launching pizzas, they are terrible at removing the pizza from the oven. They’re too thick.
This is why you need a metal peel. I prefer a perforated metal peel with ridges. This means that the peel has raised ridges that run from the front to the back of the peel that actually lift the pizza up off the peel in parts – minimizing suction and encouraging the pizza to glide off the peel from back to front.
The perforations allow corn meal to fall through the peel and I also believe that it reduces the risk of suction.
You probably thought you didn’t have risk of sticking anymore because the pizza is partially cooked, but that’s not true. Sometimes you take the pizza out to turn it and there is a little problem you have to take care of (like toppings or cheese on the stone), and if it sits there very long you have the risk of pizza sticking to the metal peel.
Cooking the Pizza
I have talked to several beginner pizza artists, and read many posts where people were upset that their pizza oven is broken because half of the pizza was burned and the other have was uncooked.
Please, don’t be that guy.
Pizza ovens cook your pizza in three ways – from the heat stored in the stone, ambient heat from the air, and direct heat from the flame.
The stone heat is important so that it cooks the bottom of your pizza. It is also probably the most important heat source to make sure that the middle of your pizza gets cooked and isn’t soggy or too droopy when you eat it.
You know that your stone heat is right, and that you’ve cooked it long enough, when the bottom of the pizza has leopard spotting (cool pizza expert lingo for brown spots on the bottom of your pizza).
Ambient heat in the air is what cooks your toppings. In a pizza oven, air tends to go up from the flame to the top of the oven, cooks the top of the pizza as it moves over it, and then gets pushed back down onto the pizza.
Direct heat from the flame is often what cooks the crust. This can be the trickiest part for new owners of portable pizza ovens – especially those designed to cook 12 inch pizzas like the Ooni Koda 12, Solo Stove Pi, Gozney Roccbox, or Bertello pizza oven, because the flame is so close to the pizza.
Even in restaurants with giant wood fired pizza ovens, they have to turn the pizzas periodically. You want to get an even browning around the entire ring of the crust. If you get a blackened or burnt section of crust, don’t worry about it – that’s natural. Besides, if someone doesn’t eat the outer ring of crust, who cares as long as they can enjoy the part with toppings!
The challenge is that you can’t keep one part of the pizza facing the flame for too long. Typically not more than 20 seconds at a time per side in a 12 inch pizza oven. For larger pizza ovens, you can go as long as 30 seconds at a time per side – depending on how close you have it to the flame.
This is what I do when using a 12 inch pizza oven:
- Launch pizza close to the fire, but not touching the flame guard. Count to 15.
- Remove the pizza, give it a quarter turn, and put it back in.
- Repeat two more times until all four sides have been cooked.
- Remove the pizza, looks at the crust to see if there are any parts that need to be cooked more. I will point that side directly to the flame and leave it in there for 5 seconds.
- Remove and repeat step 4 until the entire crust looks good.
- Lift up an edge of the pizza. The outer ring of crust should be firm enough that the whole pizza comes up without folding. The bottom of the pizza should be ‘leopard spotted’.
NOTE: If the bottom looks like it needs to be cooked more, I’ll risk darkening or burning the outside crust to give the pizza more 5 second turns in the oven to cook the bottom better – it’s worth the trade-off.
Conclusion
The most important lesson to take away from this story is that it is very likely that your first pizza will not turn out the way you want. In fact, it might be a total disaster like mine was.
But, that’s ok. Don’t give up and don’t get discouraged. I often remind people that it’s ok if they mess up. Even if they make a mistake, we’ll get it figured out and their pizza will be amazing!
Focus on the fun, enjoy the experience, and don’t stress about getting things perfect.
Making pizza with friends and family is a fun, relationship building event. They may not always remember the pizza, but they will remember the fun they had!
Want to see my method for cooking a pizza in action? Check out my video on YouTube!
Need more tips? Check out some of our other content:
On the hunt for a pizza dough recipe? Checkout my Easy Outdoor Pizza Oven Dough Recipe. It never fails and is always delicious!
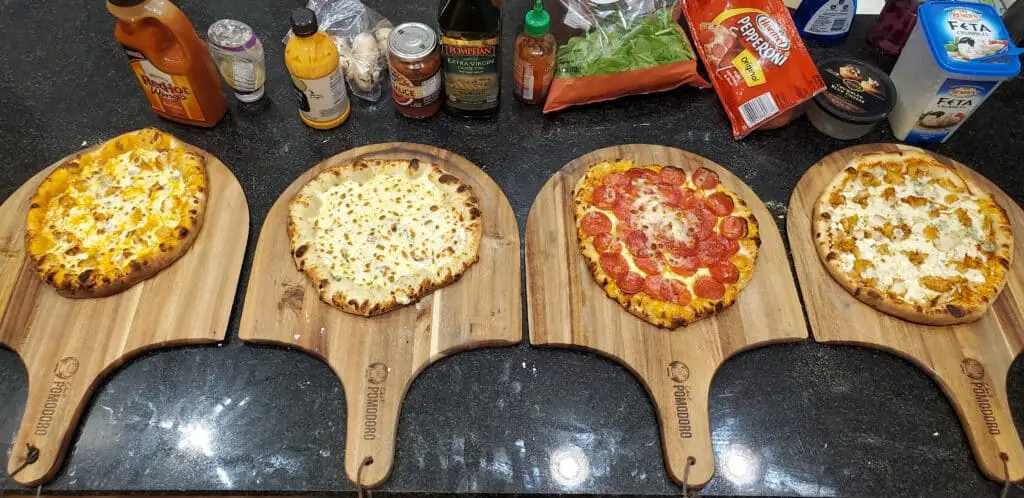
And if you’re ever looking for new pizza toppings or just want to try something new, our article on Topping Combo Ideas for a Pizza Party is sure to be a crowd pleaser! Read it now to find out which one wins out as a party favorite.
As someone from Long Island, New York, Thomas knows what it takes to make a good pizza. He understands that it’s a combination of high-quality ingredients, well-rounded pizza ovens, and a little bit of love. From the dough of a Neapolitan-style pizza to the wood that powers a wood-fired pizza oven, he has you covered. Thomas’ love of pizza is what got him here and he hopes that you’ll enjoy pizza as much as he does soon.